Helping the average investor ATTAIN KNOWLEDGE GET RESULTS HAVE FUTURE SUCCESS MAKE MONEY

Categories
Crypto Nodes Passive Income Staking

How to Setup a Presearch Node

So whatever made me want to setup a Presearch node? As you already know I love passive income platforms like Presearch, and running a node seemed to fit the bill of what I was looking for.  There is something about making money while you sleep.

Around two months ago I found out about Presearch and how they were paying people for using their search engine. Presearch has been around since the 2017 bull market, and from what I read when conducting my initial research Presearch is going to be the next big thing in search engine technology.  

When you combine something as powerful as a search engine with an emerging technology like blockchain the results are going to be interesting.  This is how blockchain technology is affecting our every day lives, and Its all around us everywhere that we look. 

The main reason I was interested in investing in Presearch however was because of the nodes that you can run by buying $PRE tokens and then staking them as part of a “node”.  I did make a Youtube video on this, which you can access below,  but I felt that I needed to post a more thorough explanation on just how to go about setting up a “node”.   

Below I have outlined the basic steps you need to take to set up a node, but feel free to leave a comment in the comment section if something doesnt make sense to you.  

*** Please note that this setup was done using a Windows 10 desktop computer.  It cannot be done on a mobile phone and requires a PC ***

*** IMPORTANT ***

Below is a video I put together of me setting up a Presearch node on a Racknerds VPS.  If you watch the video till the end, and also read the steps Ive outlined below you should be in pretty good shape.

Steps to Setup a Presearch Node

STEP ONE 

First setup a FREE account at Presearch. Use the link below to sign-up, but be sure to enable 2FA (two factor authentication) on your account !

PRESEARCH SIGN UP LINK

STEP TWO

Download PuTTy for FREE at the link below.  You will use PuTTy later in this guide to connect to your VPS in order to setup the Presearch node.

CLICK HERE TO DOWNLOAD PUTTY

STEP THREE

Click on the link below which will take you to the RackNerds website where you will need to purchase a VPS (512 MB KVM) which will be used to run the Presearch node.  Make sure you get the one with Docker installed and running on Ubuntu 18.04 or 20.04

STEP FOUR

2000 $PRE tokens are required to stake and run the node on the Presearch website, but I recommend purchasing your tokens from Kucoin exchange.

CLICK HERE TO BUY $PRE TOKENS ON KUCOIN

STEP FIVE

Send the $PRE tokens you bought on Kucoin exchange to your Presearch wallet address in the ‘NODES’ dashboard area.  You should see a button you can click that says ‘TRANSFER PRE’.

CLICK HERE TO ACCESS YOUR PRESEARCH NODES DASHBOARD AREA

STEP SIX

This is the final step where you will connect all the other steps together.  Further down below you will see the snippets of code you need to run inside of PuTTy in order to connect the VPS you bought to your Presearch account.  You will need the ‘Registsration Code’ from your Presearch dashboard in order to complete the setup.

Putting all the above steps together...

Now is the point where we run PuTTy and connect to the RackNerd’s VPS server that you bought in the above steps.  Most often this can be the most difficult thing for people to do when setting up the node, but luckily for you I have provided the correct snippets of code below so you can get your Presearch node up and running with ease.  Lets begin.

STEP #7

To complete the final setup process you need to run the ‘PuTTy’ program.  You will see a screen that looks like the one below pop-up.  After that happens you will only need to enter the I.P. Address that Racknerds sent you in the email when you bought the VPS.  After entering the I.P. address click ‘Open’

Setup Presearch node using PuTTy
You will need to enter the I.P. address that Racknerds sent you when you bought the VPS from them.

STEP #8

This is the fun part and also the one that confuses many people.  On the next screen that comes up (shown below) you will need to enter ‘root’ for the username, and will need to enter the ‘password’ that Racknerds sent you in the email when you bought the VPS.  When you paste the password you will not see it appear but it is indeed there.  Go ahead and hit enter after pasting the password into the PuTTy command prompt, and the screen will look something like below.

racknerds vps server login to presearch

STEP #9 (Added on 11/20/2022)

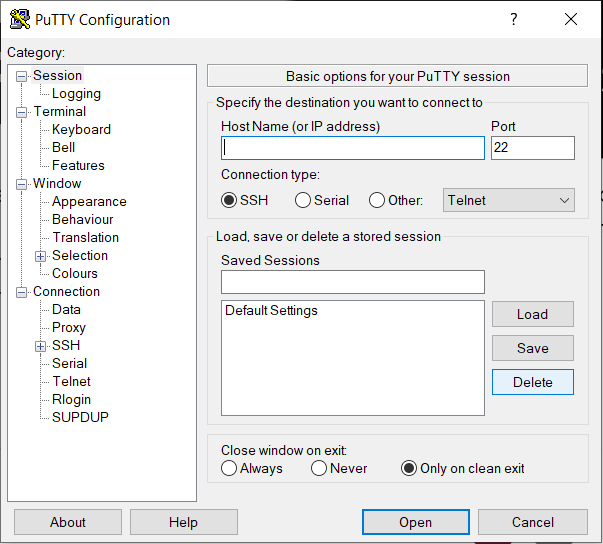
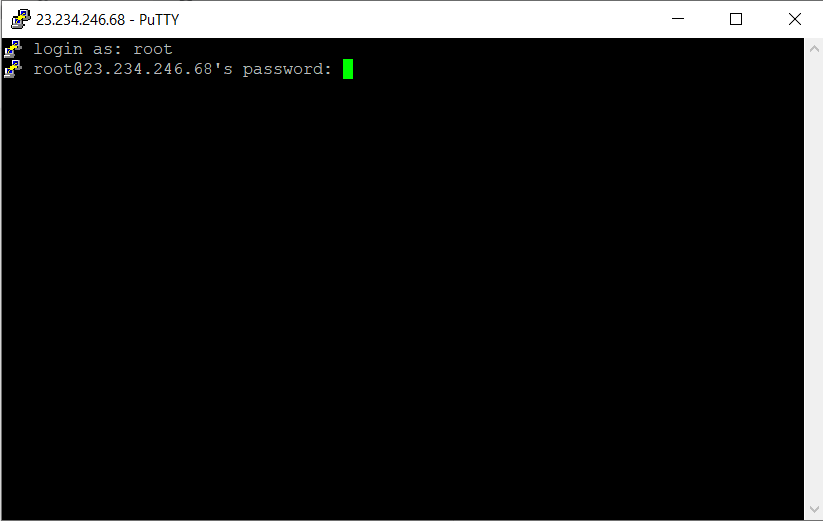
If the VPS you bought does not have Docker installed on it you will need to install it.  Below is a link to the commands you will need to install the latest version of Docker.  You must be logged into the VPS in order to install Docker.

✅ >>> CLICK HERE FOR INSTRUCTIONS ON HOW TO INSTALL DOCKER ON UBUNTU 20.04 VERSION OF LINUX. <<<

STEP #10

After you enter the username and password above in order to connect to your Racknerds VPS you will be logged into the VPS.  You are now ready to setup the Presearch node.  The code needed to setup the Linux VPS for Presearch is shown below, and you must copy and paste it into the command line shown in PuTTy below.

setup presearch node using racknerds vps

Below is the command that must be copied and pasted at the small green box command prompt shown in the above image. See blue text below.  

INITIAL NODE SETUP CODE

docker stop presearch-node ; docker rm presearch-node ; docker stop presearch-auto-updater ; docker rm presearch-auto-updater ; docker run -d –name presearch-auto-updater –restart=unless-stopped -v /var/run/docker.sock:/var/run/docker.sock presearch/auto-updater –cleanup –interval 900 presearch-auto-updater presearch-node ; docker pull presearch/node ; docker run -dt –name presearch-node –restart=unless-stopped -v presearch-node-storage:/app/node -e REGISTRATION_CODE=$ENTER YOUR REGISTRATION CODE HERE presearch/node ; docker logs -f presearch-node

Its very important that you replace the orange wording in the code above that says “$ENTER YOUR REGISTRATION CODE HERE” with the  registration code that is found on the Presearch dashboard when you made your account.  See snapshot below so you know where to find this.

presearch node registration code from dashboard

STEP #11

After you have ran the code above to setup the Racknerds VPS to run the Presearch node you will see a large blue letter ‘P’ pop up near the end of the code.  It will also say it is ‘listening for searches’.  If you see that and everything looks like the screen below then you should be good to go and we can complete the last step.  Sometimes the Blue ‘P’ will not show up but the node has still been set-up properly.  

presearch setup successful on racknerds vps
This is what you will see if you installed the node correctly onto the Racknerds VPS

STEP #11

The node is now setup but you still need to stake your 4000 $PRE tokens in order for your Presearch node to make more $PRE tokens.  Go back to the main Presearch dashboard areas and scroll down to the bottom.  You will see the node show up but it does not have a name yet and it does not have the tokens staked to it.  Also note that nodes that are connected properly show a green socket plugin as shown below. If you do not see the green socket then you need to run the repair code that Ive included further down below.  

final presearch node setup
You can edit any of the nodes by clicking on the small edit pen on the left side under the 'node description' column
final setup up and staking of pre on node
As you can see above you must type in the number of tokens you would like to stake (minimum is 4000 for node to work). I would recommend also putting the I.P address of your node in the description along with numbering each node.
Repair Code

There is a chance that something might go wrong when you setup the Presearch node in PuTTy, and in that case I would recommend using the below ‘repair’ code to help fix the problem.  This has worked well for me if I had any problems while running the initial setup code.  Keep in mind you would run this after you have already run the initial set-up code above, and if you dont see the little green socket on the main Presearch dashboard.

REPAIR (ALREADY SET-UP NODES)

docker stop presearch-node ; docker rm presearch-node ; docker stop presearch-auto-updater ; docker rm presearch-auto-updater ; docker run -d –name presearch-auto-updater –restart=unless-stopped -v /var/run/docker.sock:/var/run/docker.sock presearch/auto-updater –cleanup –interval 900 presearch-auto-updater presearch-node ; docker pull presearch/node ; docker run -dt –name presearch-node –restart=unless-stopped -v presearch-node-storage:/app/node presearch/node ; docker logs -f presearch-node

Important Presearch Links

Below is a list of  links to all the exchanges and companies mentioned in the above post:

  1. Presearch – For doing searches, monitoring your nodes, and other things.
  2. Putty – For interfacing with and setting up the Presearch node.
  3. Racknerds VPS – For running the Presearch node.
  4. Phoenix Nap – Docker Installation Guide for Ubuntu 20.04 Linux Server.
  5. Kucoin – For Buying $PRE token.  You must have 4000 $PRE tokens staked per node.